If you like this post, help us share it

Is it hard to photograph a Lunar Eclipse? Absolutely not. Every year, there are at least two lunar eclipses and as many as five, a lunar eclipse can occur when the Moon passes directly behind the Earth into its umbra (shadow). This can occur only when the Sun, Earth, and Moon are aligned exactly, or very closely so with the Earth in the middle. Hence, a Lunar Eclipse can only occur the night of a full moon. The type and length of an Eclipse depend upon the Moon’s location relative to its orbital nodes.
Unlike a solar eclipse, a Lunar Eclipse may be viewed from anywhere on the night side of the Earth and last for a few hours. Lunar eclipses are also safe to view without any eye protection or special precautions, so it is an amazing phenomenon to photograph or film. Unlike photographing night sky with stars and milky way, photographing Lunar Eclipse does not require long exposure due to the bright full moon.
[REWIND – Night Sky Photography – How to photograph Stars and Milky Way]
Before you start to photograph a Lunar Eclipse , it does require some preparation before hand but they are fairly simple. It does pay off if you know more about the type of Lunar Eclipse, so you know what to expect. Typically there are Partial Lunar Eclipse or Total Lunar Eclipse depending on how the Moon passes through the Earth’s umbra. Understanding the timing of the Lunar Eclipse is also important so you know when the critical contacts occur and how long you need to stay out in the dark. Check out this Wiki page on Lunar Eclipse if you want to know more on this.


Preparation
For preparation, you need to find out when does the Eclipse occur and whether it is visible at your geological region. For this information, visit NASA’s Lunar Eclipse website here and you will be able to see a list of Lunar Eclipse dated from 1951-2050.
A concise summary of all Lunar Eclipses is summarised by a decade long tables. For information up to year 2020, this is the table to look at. The table presents some important information such as the first column gives the Calendar Date of the instant on greatest eclipse. The third column lists the Eclipse Type which is either Total, Partial, or Penumbral. The Eclipse duration is also specified, if the eclipse is total then two durations are listed. The first is the interval between the beginning and end of the partial phases. The second value (in bold) is the duration the total phase.
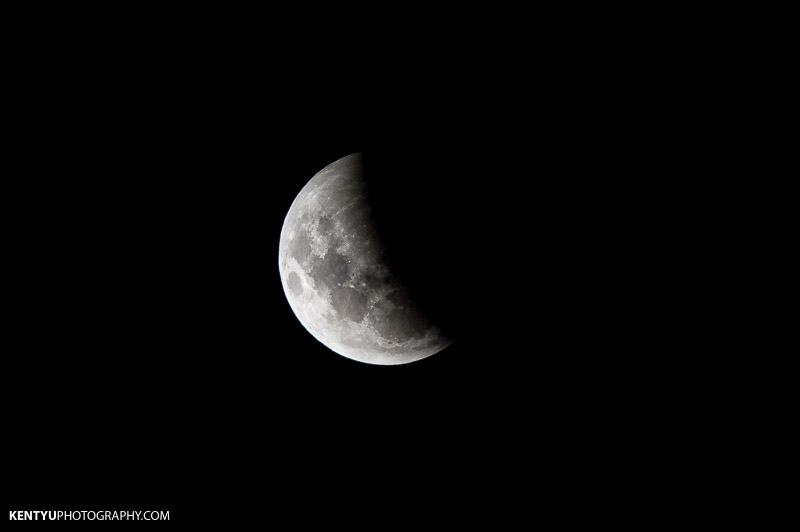
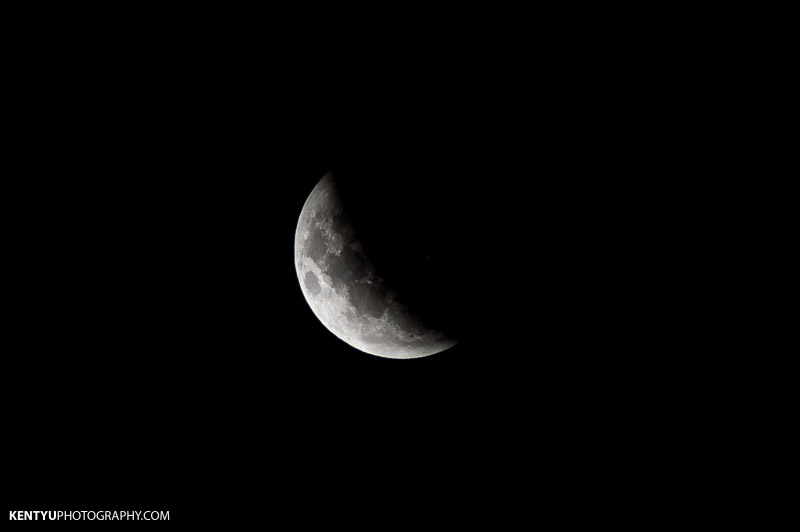
Click onto the calendar date of the specific Lunar Eclipse for more information on the specific Eclipse. For example, the Total Lunar Eclipse that I have photographed here was taken on the 4th April, 2015 and this is the details of the Eclipse. The crucial information are the Eclipse duration, timing of the Eclipse contacts and greatest Eclipse, as well as the geological map that shows whether the Eclipse is visible to your region.
Camera Gear
A tripod is handy when it comes to taking photos of the night sky, not only it provides stability but also allows consistency with the framing of the Moon. Note that the Moon is brightly lit at the beginning of the Eclipse and become darker as the Moon passes through the Earth’s shadow, so you will need to adjust the exposure accordingly. Especially towards the greatest Eclipse, the sky becomes a lot darker.
To photograph the Moon in great details, you will need a very long telephoto lens or alternative you can crop your photos to mimic the effect. Typically a 1000mm (35mm equiv.) focal length would give you a reasonable reach to capture the Moon’s detail. There are a few options that can give you this reach.
1. 35mm DSLR with 500mm lens (or longer) + 2x Teleconverter (1000mm, 35mm equiv.)
[Nikon D810 or Canon 5DS R | Canon 500mm f/4 or Nikon 500mm f/4 | Nikon 2x TC or Canon 2x TC]
2. 35mm DSLR with 70-200mm + 2x Teleconverter and Crop (400mm, 35mm equiv.)
[Nikon D810 or Canon 5DS R | Canon 70-200mm f/2.8 or Nikon 70-200mm f/2.8| Nikon 2x TC or Canon 2x TC]
3. Power Zoom compact camera such as Nikon P900 with 83x optical zoom (2000mm, 35mm equiv.)
[Canon PowerShot SX60 HS or Nikon P900]
Option 1 is obviously the most expensive with a super expensenve 500mm lens but it does give the best image quality. Option 2 is a more reasonable approach using a 2x TC on a 70-200mm lens. If combined with a high resolution camera like the Nikon D810 (36MP)or Canon 5DS R (50MP), you can still get a high resolution image out of it after cropping. The absence of a low pass filter on both cameras means the image is sharper which is beneficial to this application. Option 3 uses a power zoom camera which offers a focal length of more than 1000mm (35mm equiv.), power zoom camera is relatively cheap but its image quality is not as good because of its small sensor size. Image noise becomes apparent with this setup since the typical ISO used here is from 400-3200.

Camera Settings
The camera setting used to photograph Lunar Eclipse is fairly simple. First set you focus to infinity or you can auto focus on the Moon. I find auto focusing on the moon tends to be a bit more accurate.
To determine the shutter speed apply this rule of thumb: shutter speed = 1/focal length, so if you your focal length is 400mm then your shutter speed should be at least 1/400s. Since a full moon is quite bright, you should be able to use a smaller aperture, start with f/5.6 or f/8 to give you the sharpest image (lenses tend have an optimal performance at around f/5.6 –8). At this point, the only camera setting left to choose is the ISO. Set your ISO to 400 first and do some test shots. Increase or reduce your ISO until you have the right exposure. The camera setting I have used here was 1/800s, f/8, ISO 400 and as the Total Lunar Eclipse approaches, the camera setting changes to 1/5s, f/5.6, ISO 3200. The Moon becomes much dimmer especially towards Totality.

Photographing
It is a good idea to set up your camera 10-15mins prior to the start time of the Eclipse. From the preparation steps discussed earlier, you should have determined the duration of the Eclipse and all the timings of each contact P1, U1, U2, Greatest Eclipse, U3, U4 and U5. These are the critical times to photograph as the phenomenon occurs. Once the Eclipse starts, you can then set up a time lapse using the camera’s intervalometer. The interval can be set by dividing the duration between each contact with the number of photos you want to take. For each photo, check and correct the exposure as the Moon gets dimmer. Also pay attention to the framing of the photo to ensure the Moon is still within the frame.
If you are lucky enough to experience a Total Lunar Eclipse, at the greatest Eclipse the Moon is completely shadowed by the Earth’s umbra and appears to be red which is refer to as a Blood Moon.

Where can I find the equipment seen on this site?
If you find this site useful and planning to purchase any of the equipment seen on this site, please show your support by purchasing your photo equipment at B&H Photo Video, or through any of the affiliate links seen on this site.
