If you like this post, help us share it

Canon has just introduced their new Speedlight 600EX-RT(B&H) which has a built in radio trigger and the partnered ST-E3-RT Speedlite Transmitter (B&H) . They offer much more flexibility in setting up a reliable wireless multiple flash system . Unfortunately, the new EOS-5D III doesn’t have a built in radio trigger to trigger off camera flashwa nor a built in flash to use as a flash commander, so Canon users need to use either a 600EX-RT or ST-E3-ET or Pocket Wizard PlusIII/FlexTT to trigger their off camera flash.
For Nikon users, our recently announced SB-910 (B&H) does not offer radio trigger, so we can only rely on slave trigger to trigger our off camera flashes or with the pop up flash as flash commander. There is a wide range of triggers out there, ranging from the most expensive PocketWizard, Phottix, to the cheapest Yonghuo. All of the setup requires a transmitter attached to the hot shoe and a receiver attached to each off camera flash. Some triggers offer i-TTL triggering like the PocketWizard FlexTT5 and Phottix Odin.
So does this mean built in radio trigger will soon offset the use of Pocketwizard? Yes probably in some cases, but PocketWizard still has a lead in transmission range. PocketWizard Plus III and Flex TT5 (B&H) both offer a maximum transmit range up to 300m compare to 30m on the 600EX-RT. Commercial shooters and location shooters will still benefit from this advantage from Pocketwizard. The new Canon radio based wireless transmission does impose some limitations to older EOS cameras. When used for radio-based Wireless E-TTL with any Canon EOS camera introduced prior to the EOS 5D Mark III or EOS-1D X, the maximum available sync speed for flash will be one stop slower than normal. So the sync speed drops to about 1/100s which is even slower than the Sony NEX-5N. High speed sync is also not possible for any Canon EOS camera introduced prior to the EOS 5D Mark III or EOS-1D X. These are the limitations that we have to face bridging old techology with new. Also I find the PocketWizard Plus III has a better design, you can view the LCD from the side instead of from the top and AC3 controller is much simpler to use than pressing digital buttons on the 600EX-RT and ST-E3-RT. Nevertheless, built in radio trigger is the new standard and everyone will benefit from it.
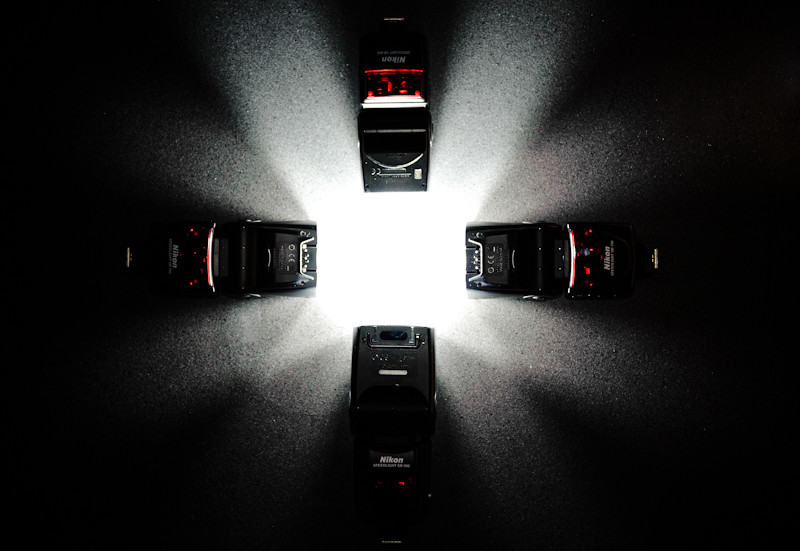
The below image of four Nikon speedlights were triggered using a pop up flash, no extra device was needed. You can either set the flashes as remote for i-TTL triggering or SU-400 as “dumb” remote flashes.
We use a lot of off camera lighting, flashes for weddings whether on light stands or with the help of assistants. They are important in creating those natural and flattering looks on the photos. Here are some tips on off camera flash photography.
What are the advantages of using off camera flash?
First, there is nothing less flattering than lighting your subject front on. It’s just like blasting your car head lights to your subject, it won’t be very flattering at all. Not to mention that when your subject looks at the camera, the on camera flash camera can cause problems with red eyes, eye squinting, etc. Also off camera directional flashes such as rim light can create shadows and highlights for a more three dimensional photo.
As with all flash photography, your background and subject are metered separately. There are two parts to it:
- The background exposure is controlled by ISO, aperture and shutter speed (assuming the background is far enough and not affected by the flash)
- The subject exposure is controlled by ISO, aperture, flash power, and flash distance.
How to set up off camera flash?
Off camera flash is not only limited to people portraits, here is an example on how we use off camera flash for wedding ring shots.
Since wedding rings are small, even a bare flash looks like a large soft box to the rings. So we don’t need any light modifier, but we do need PocketWizard to trigger our off camera flash. We use PocketWizard FlexTT5 which gives us i-TTL capability. Check out this post on how to set up PocketWizard FlexTT5.
The basic workflow is first meter your background and choose the desire camera settings to expose the background the way you wanted. Once you setup the background exposure, keep the settings. The next step is to add flash to light up your subject, You can either use TTL or M to control the flash power, adjust the flash power, direction and distance until your subject is correctly lit. Throughout the process, you will need to take test shots to check the exposure.
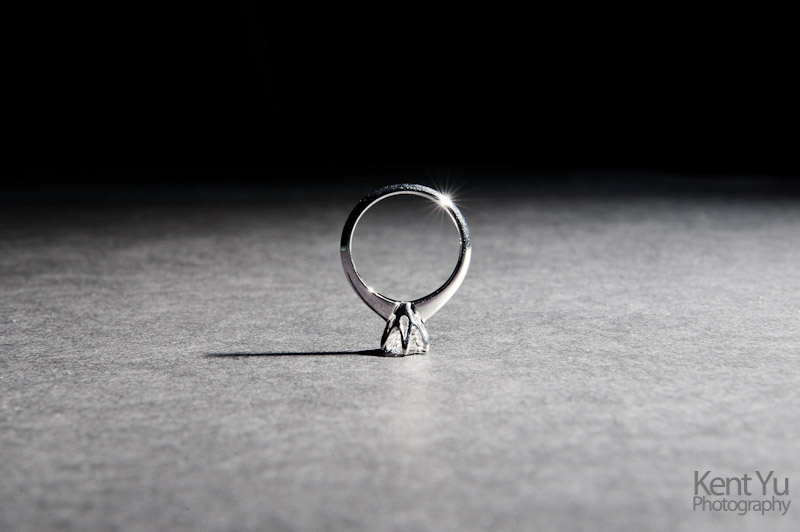
The wedding ring photo below was shot stopped down at f/22. There are two reasons for the choice of f/22;
1. We wanted to create a large DoF since we were shooting so close to the ring. Check out this post on how distance affects DoF.
2. We wanted to eliminate the background to give it a clean black background (i.e. we chose f/22 to control the exposure of the background).
We first exposed the background at ISO 200, f/22 and 1/250s (which is the sync speed on most DSLRs). This gives us a black background we wanted.Then we lighted up the ring using TTL and adjust flash compensation to suit.
The speedlight was placed to the right, you can tell by the reflected flare and the shadow.
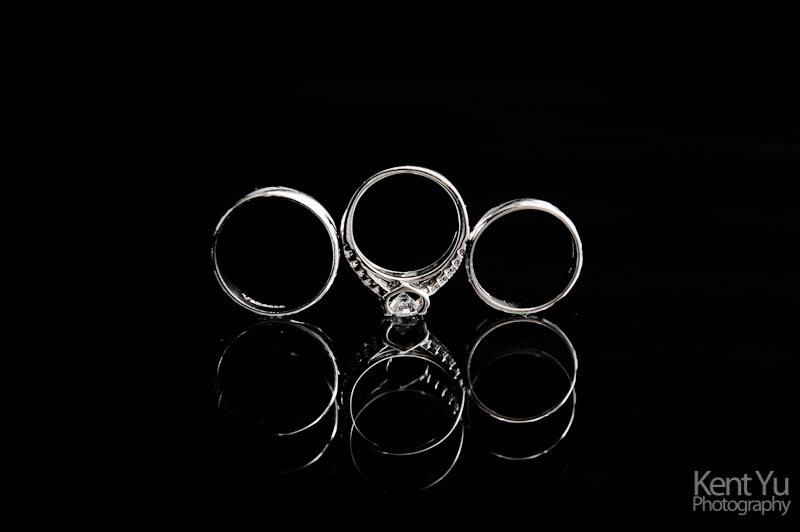
Here is another image lit by a single SB-900 at full power. The camera settings were ISO 200, f/8, 1/60s. By having the speedlight off camera, we have full control on the direction of light and reflection.
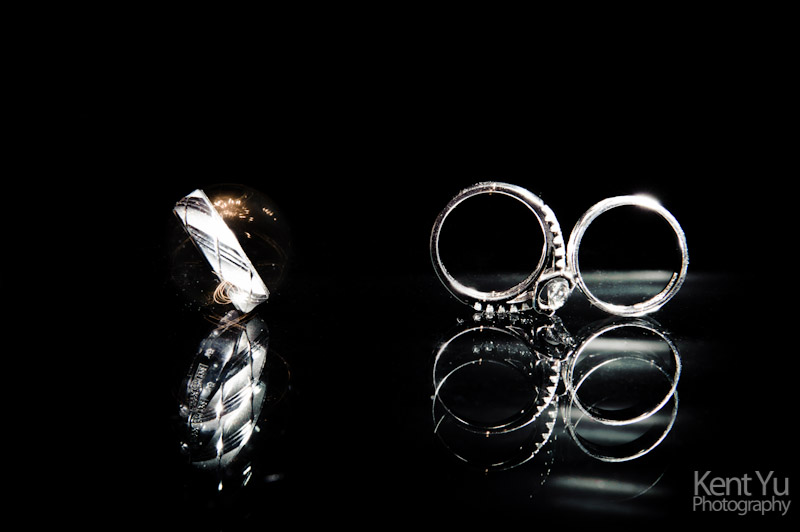
To capture some ring movement, we dragged the shutter to 1/2.5s and stopped down to f/22, still using full power of the SB-900. Leave us a comment below if you have any questions on flash photography or off camera flash setup/settings.

Where can I find the equipment seen on this site?
If you find this site useful and planning to purchase any of the equipment seen on this site, please show your support by purchasing your photo equipment at B&H Photo Video, or through any of the affiliate links seen on this site.
