If you like this post, help us share it

Studio lighting doesn’t need to be complex. You can create beautiful studio portrait lighting with just one or two lights. More importantly, have a mind-set to what type of lighting and images you want to create. You might be overwhelmed by the different types of lighting equipment and modifiers at first, but as you shoot more and more with them, you will get to know the characteristics of each modifier. So the first tip is to pick a modifier and practice lots with it, then move to the next one and repeat. Once you are familiar with them, you will know how to set up your light and choose the right modifier. To learn more about the different types of light modifiers, check out this site. It has all the information for each type of modifiers.
For all your lighting and studio needs, check out B&H’s lighting section.
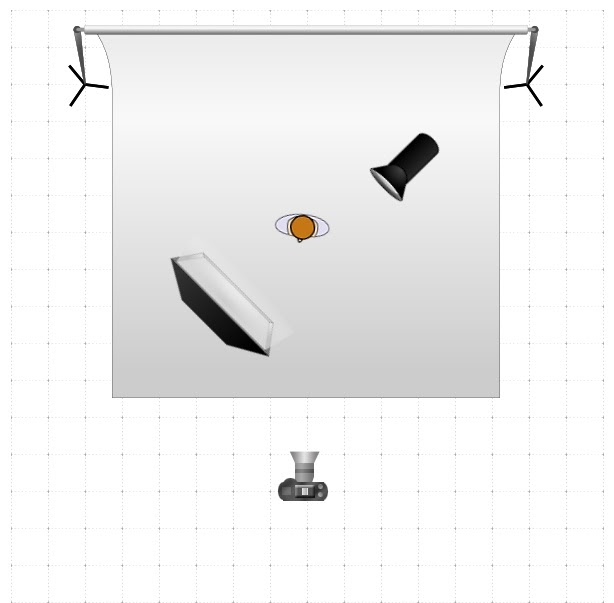
So back to the question – how to set up a simple portrait lighting. Let’s start off with two lights and a softbox. Light modifiers like softboxes are essential to shape and diffuse the light to create all sorts of unique looks. A common setup is to setup a light with softbox for your subject and one light for the background, this will create a clean white background look. The trick here is to over expose the background by one stop higher than your subject. (Tips: Use a reflector as fill if you find the shadows are to harsh).
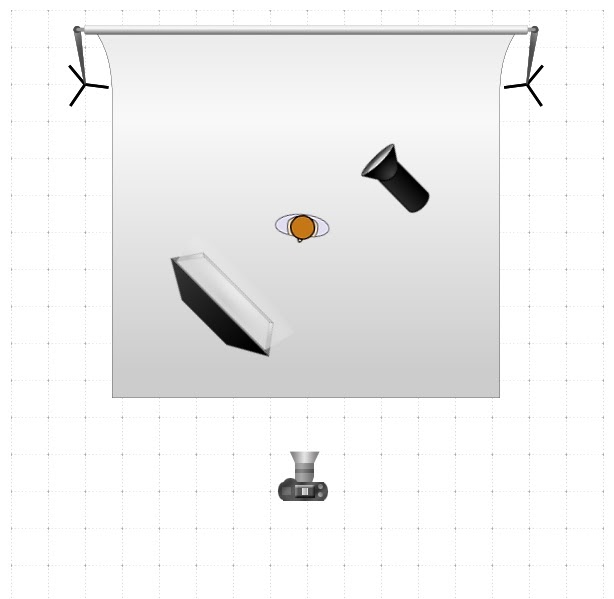
Once you have master this setup, you can try to alter the background light or introduce a third light as a rim light. There are a couple of options here:
1) Hair light – Place the light high up and direct it to the hair from the side to give a highlight to the hair, or
2) Rim light – Put on a strip softbox and place it to the side to give a highlight to the contour of the body.
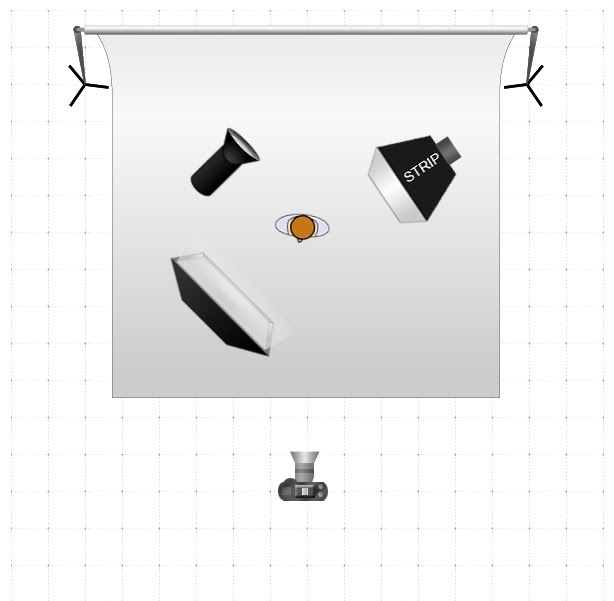
(1) (2)
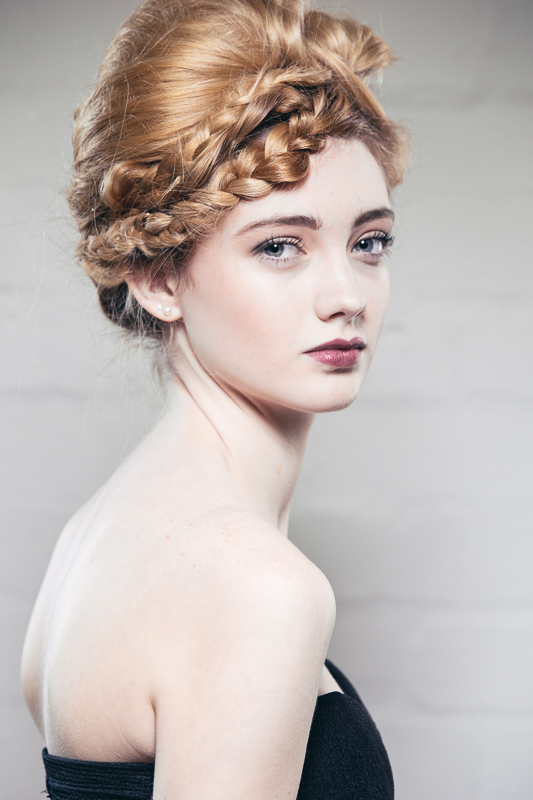
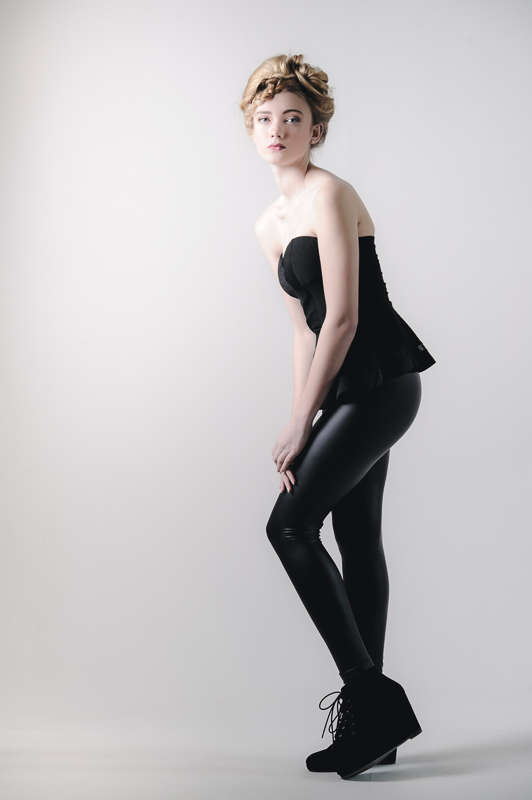
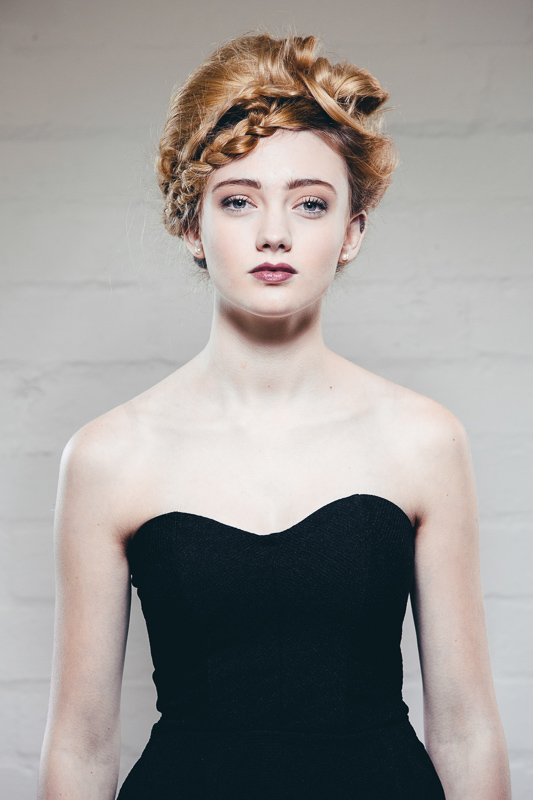
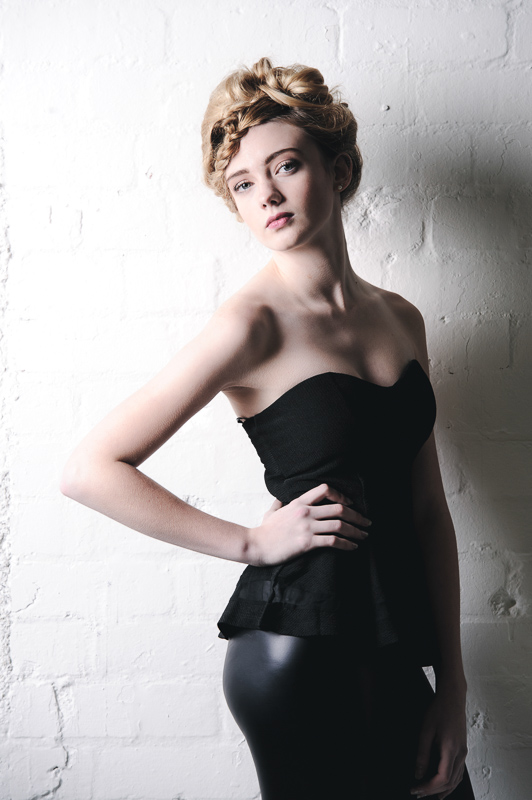
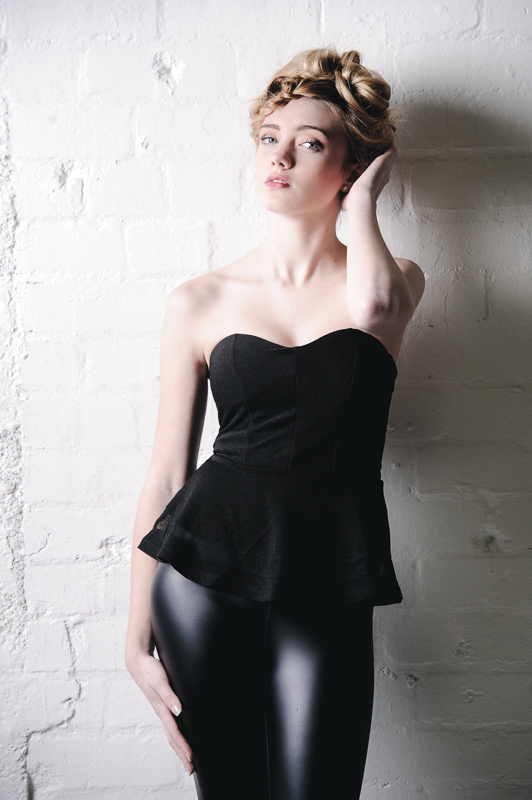
My preferred simple two light setup has to be a key light plus a rim light arrangement. I have use the exact setup for this image except with a beauty dish in place of a softbox to create a more beauty look. The rim light gave a touch of highlight to the side and the background here is under exposed by about 1-1.5 stop.
There are lots of combination to play with just using two lights. When you have mastered these, you can start to play around with different light placement, different modifiers and introducing more lights. The key to success is start with a simple setup that you know, work your way up and remember you don’t always need a complex lighting setup.
Here is a list of the equipment that we have used for this shoot. Drop us a comment below if you want to find out more.
- Nikon D4
- Nikon 70-200mm f/2.8
- Nikon 85mm f/1.4
- Elinchrom Strobes
- Beauty Dish
- Strip softbox
- Reflector
- Rectagular softbox
Where can I find the equipment seen on this site?
If you find this site useful and planning to purchase any of the equipment seen on this site, please show your support by purchasing your photo equipment at B&H Photo Video, or through any of the affiliate links seen on this site.
