If you like this post, help us share it

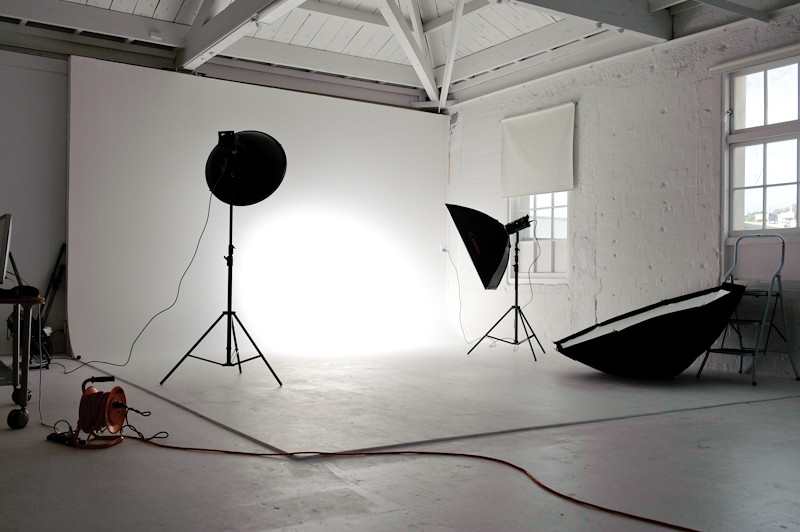
When it comes to lighting, we use all sorts of equipment and modifiers to ensure we have the “nicest” lighting possible; Reflectors, Soft boxes, Beauty dishes, etc… A lot of people think that studio lighting is complicated and difficult to setup. While studio lighting certainly takes longer to setup and they are big and heavy, I find studio lighting is much easier to work with than shooting outdoor. This is because in a studio, we create lights, but when we are shooting outside, we have to create light and balance the light with the sun, which is much more challenging and usually require some powerful strobes.
In a studio, everything is controlled, unless you are using natural light from the windows. With that it is a much more comfortable shooting environment, there are lots of space to set up your equipment and to move around, also you are in a closed environment not affected by the weather like sun, rain and wind. You can even crank up the air conditioning on a hot summer day.
Some studio lighting setups are complex but there are simple studio lighting setups that work equally well. This can be in the form of a three, two or even one strobe setup.
There are many different ways to set up your strobes and there is no one fix rule on how to do it. “Nice” light is what you are looking for and you can do it whichever way.
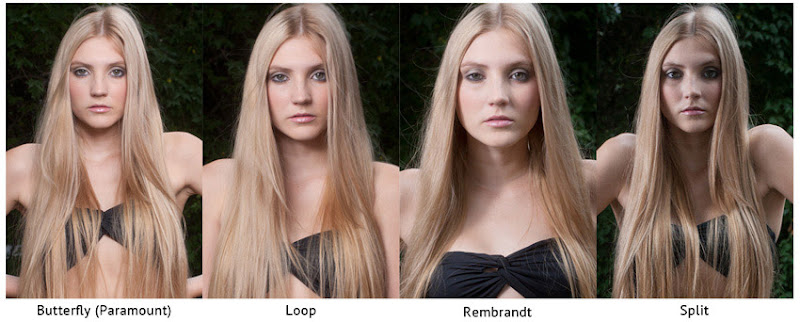
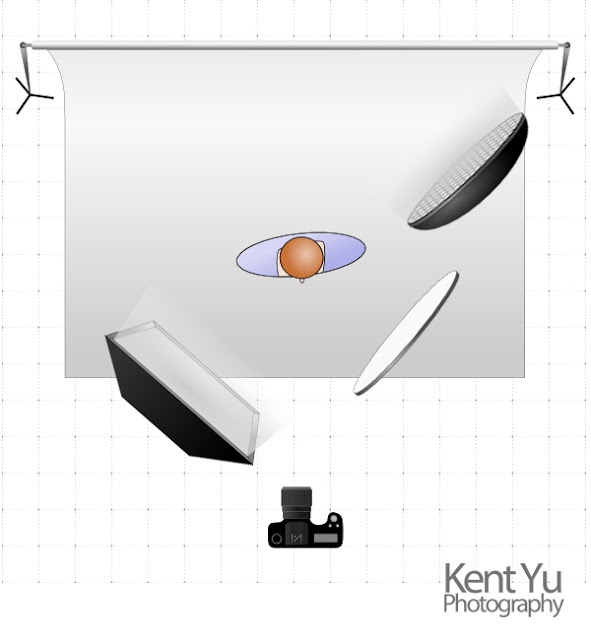
However, to help with creating that “Nice” light, there are some typical lighting patterns that you need to be familiar with. Below is a description of each lighting pattern and how each of the them looks like (image from planet neil).
Butterfly – the light source is placed in line with the model’s facing and lighting from above the head. The result is creating a butterfly-shaped shadow that it casts below the nose.
Loop – the light source is placed slight left or right to the model’s facing and lighting from above the head. The result is creating a loop-shaped shadow under the nose. This gives a more dimension look to your model by imparting a sense of depth.
Rembrandt – this is similar to loop lighting except the light source is moved higher and further to the left/right of the subject, usually at 45o. The result is creating a small triangle of light that appears under the eye on the shadow side of the face, along with a nose shadow that nearly extends to the corner of the mouth. It produces a much more contrast image.
Split – the light source is placed 90o left or right to your model and slightly above the head. The result is creating half of the face in shadow and hence giving a split tone. It produces a more dramatic image.
Which one is better depends on the type of image you are creating and your personal preference. There is no one best lighting setup. It all comes down to what you are aiming to achieve . But my suggestion is that, don’t copy a certain type of lighting setup, every model is different, so each setup should be different too. More importantly is to train your eye seeing that “Nice” light.
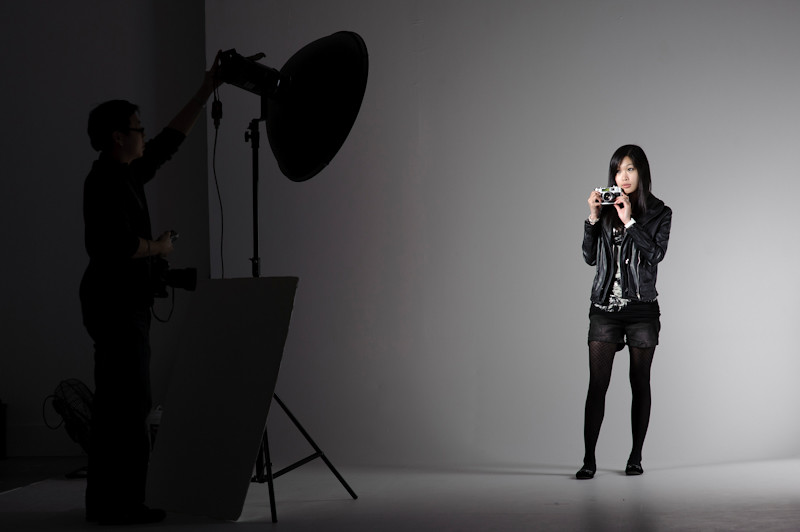
A nice light do not need complex lighting setup, the above lighting patterns can be achieved with only one strobe. Of cause with more lighting equipment, you can create more dimension to the image. There are also many light modifiers to “shape” your light to achieve that specific look. We shall talk about that next time.
You don’t need a complex lighting setup to create the above lighting patterns. Of cause with more lighting equipment, you can light up more dimension of the image. To find out more about lighting, you can check out more lighting tutorials and lighting gear at B&H – Lighting.
To put things in perspective, let’s look at some examples.
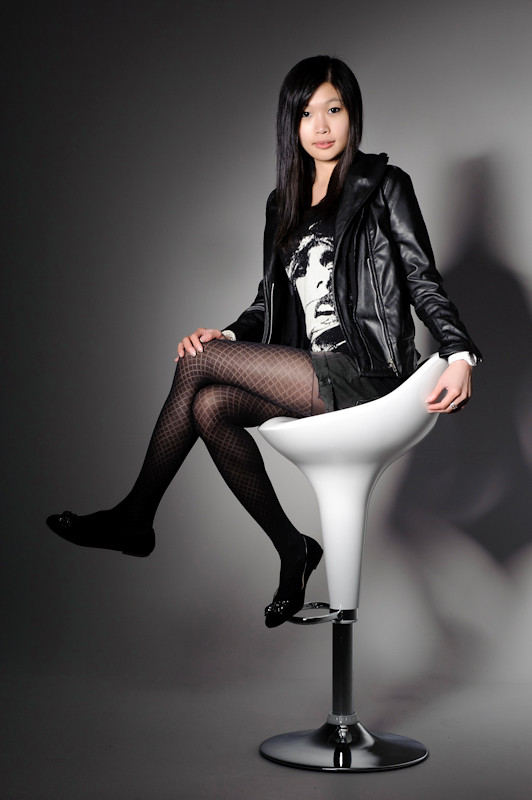
Here is a simple setup of loop lighting which I personally like the most. The setup is similar to Rembrandt lighting but the light is placed more toward the centre.

We placed the model close to the backdrop to create the shadow, giving more contrast to the image. From the shadow, you can tell where the light is placed.
Here is a two lights set up, you can put on different kind of modifiers to create the lights that you want. We chose to use two beauty dishes with grid to create a greater fall off and to control the spread of the light.

Two beauty dishes, one to the left and one to the right
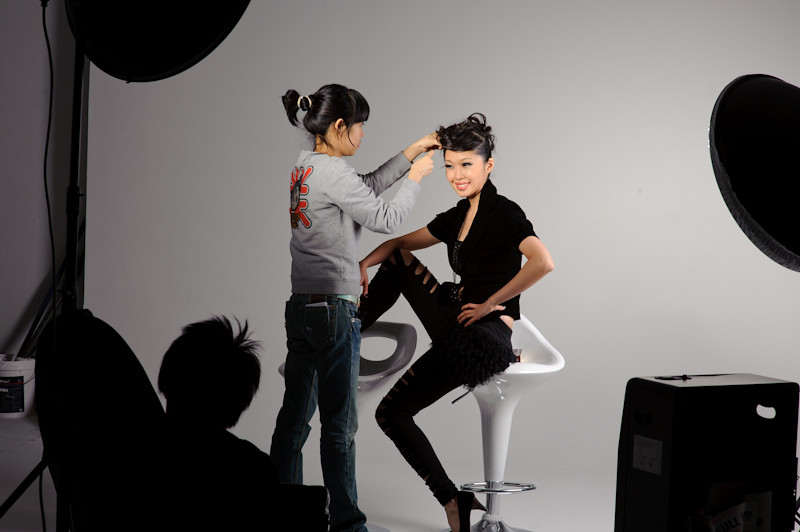
To create a dark background from a white wall, we controlled the ambient exposure by adjusting the aperture and shutter speed. We have also brought the model forward, so the spread of the light do not fall onto the back wall. With the grid on the beauty dishes, we have limited the spread of the light. so the light quickly falls off outside our model. The second light on the right is powered down to lift up the shadow, just enough to see the contour.
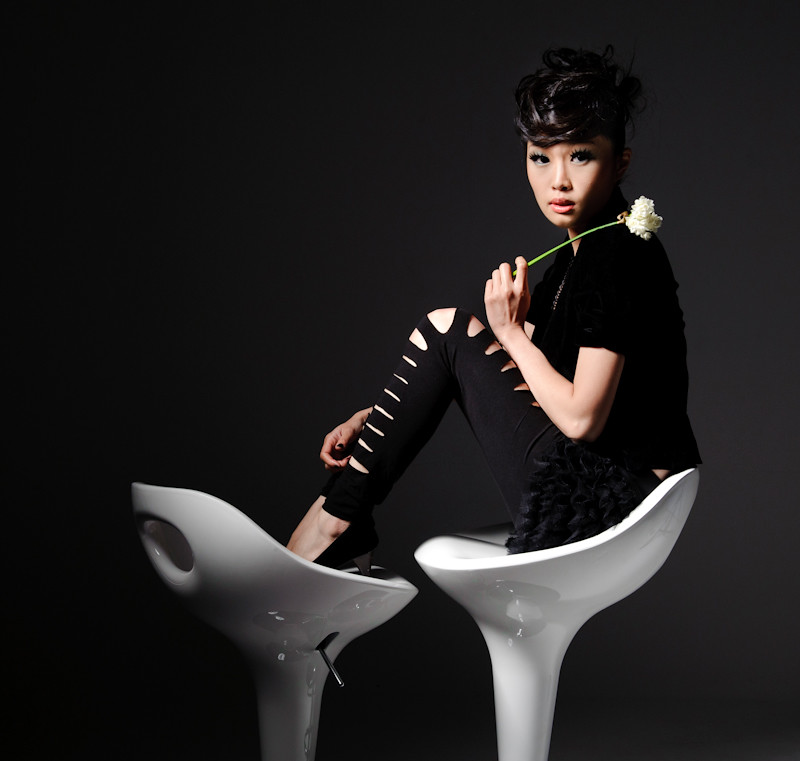
With a two light setup, you can use one of the light to control the background, and the other light for your subject. You can also bring in a reflector to enhance the light on the short side.
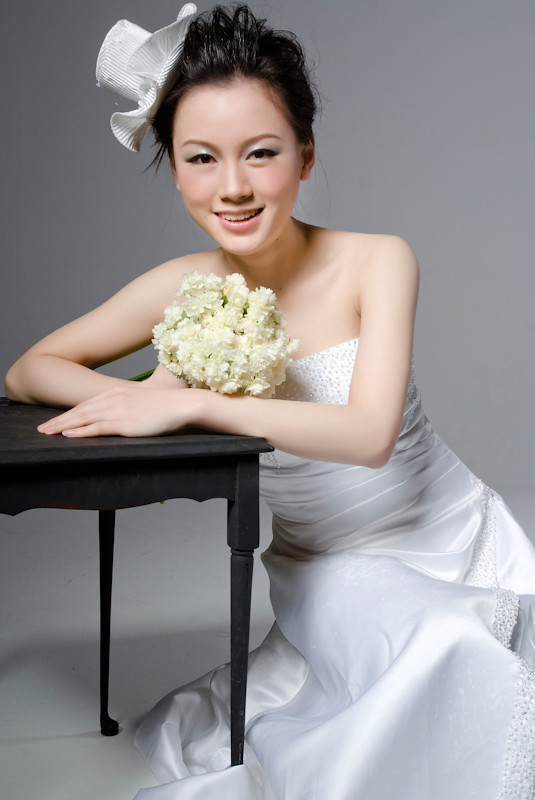
Here is a pull back shot of our two lights setup. Since the wedding dress is in white colour , we don’t want the background to be purely white as well, so we used a beauty dish for the background to create a gradient lighting as the background.
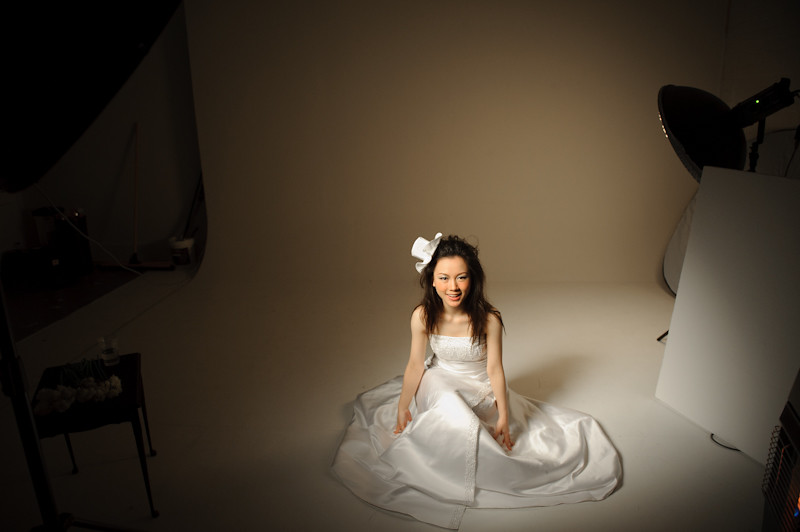
Here is a shot using a two lights setup. The reflector helped to fit up the shadows on the short side (right hand side).
I hope this gives you some basic ideas on how to set up some simple studio lighting using 1-2 lights. Once you have mastered this, you can add addition lights such as rim light to expand your set up.
Where can I find the equipment seen on this site?
If you find this site useful and planning to purchase any of the equipment seen on this site, please show your support by purchasing your photo equipment at B&H Photo Video, or through any of the affiliate links seen on this site.
